Complete a form
Provide a form that participants will need to complete.


Onthen allows you to create onboarding 'plans' that you can send to customers, partners, prospects, or anyone else (we call them 'participants'). Each plan has a set of tasks that a participant needs to complete.
Our Complete form task allows you to build a form using standard fields (such as text, select, date, etc.) and ask your participants to fill it out.
This task action is provided by Onthen and doesn't require any outside service.
You'll build the form in the template editor, and can select from a range of field types. You can set these fields to be required/optional, add a description (helper text), and set additional attributes based on the type of field (e.g., set a min/max amount for number fields).
In a live plan, the participant will simply be presented with the form and complete all the fields you expect.
If the plan is connected to a CRM, we'll save the values to the selected fields within the linked CRM object.
In Onthen, open the template you want to add a complete form step into.
In the section you want to add the task, click Add task. Select Onthen / Complete form as the task type. Add a description, due date, etc. if you need. Click Add task to create the new task.
When the task is saved, click on its name to configure it. You'll see a page like this:

Now you can begin to build the form. Click Add field to choose a field type and create a field.
You can choose from these field types:
We'll add a simple text field first:

Type a name for the field type, and once that's done click Save changes. Now you'll see the field in the form:

Now use the menu on the right of the field and click Field settings to configure it further. You'll see more options to update the field:

Click Save changes if everything looks good. Finally, we'll add a date field to complete this demo form:

Tip: Drag and drop using the handles to the left of each field to change its order in the form.
Note: There's no need to manually save this type of task action. It's saved each time you make a change to it.
If your template is linked to a CRM object, you'll be able to sync fields with CRM properties. This means that after the participant completes the form, the data in the field will be synced/copied to the linked property in the CRM.
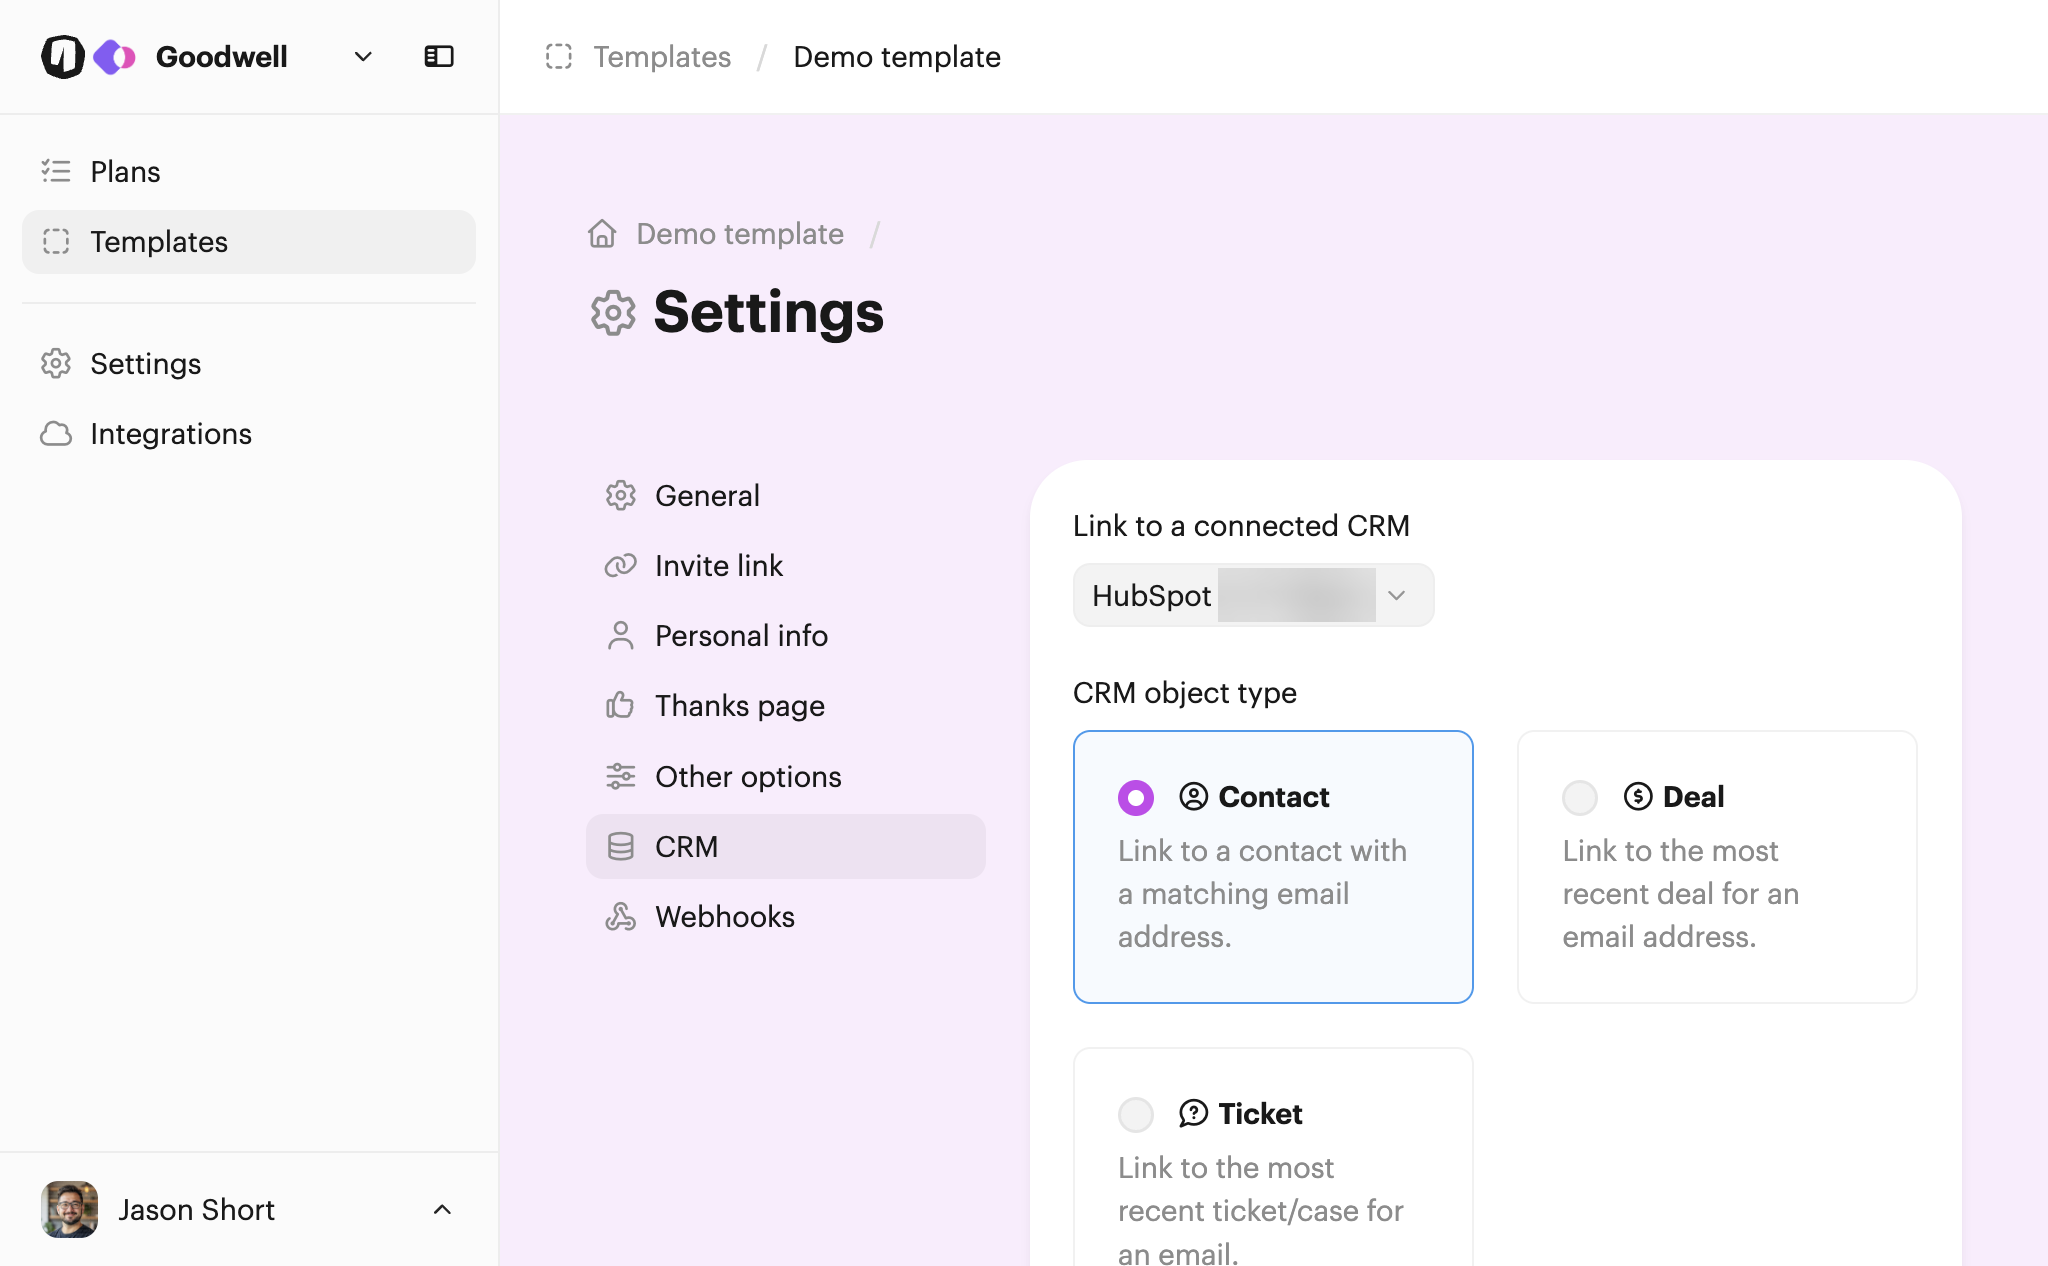
Before you can select a property to link to, make sure the template is connected to your CRM. Click Template settings on the main template page, select the CRM tab from the menu, and then link a CRM.
Once you've done that, the settings should look something like this:
Returning back to the form field, click Field settings again. You should now see an option to select a CRM property to link to the field:

Do this for each of the form fields you want to sync to your CRM.
Tip: If you add or rename form fields in your CRM, we'll periodically reflect those changes in Onthen. But if you've made a change and need to see it immediately, click the Refresh button next to the property select box.
When all your fields are configured and linked to your CRM, we can now test the task.
You can test the action by creating a new plan.
The quickest way to test this task action is to go to the list of plans after you've created the new plan, and click its name to open it as the user.
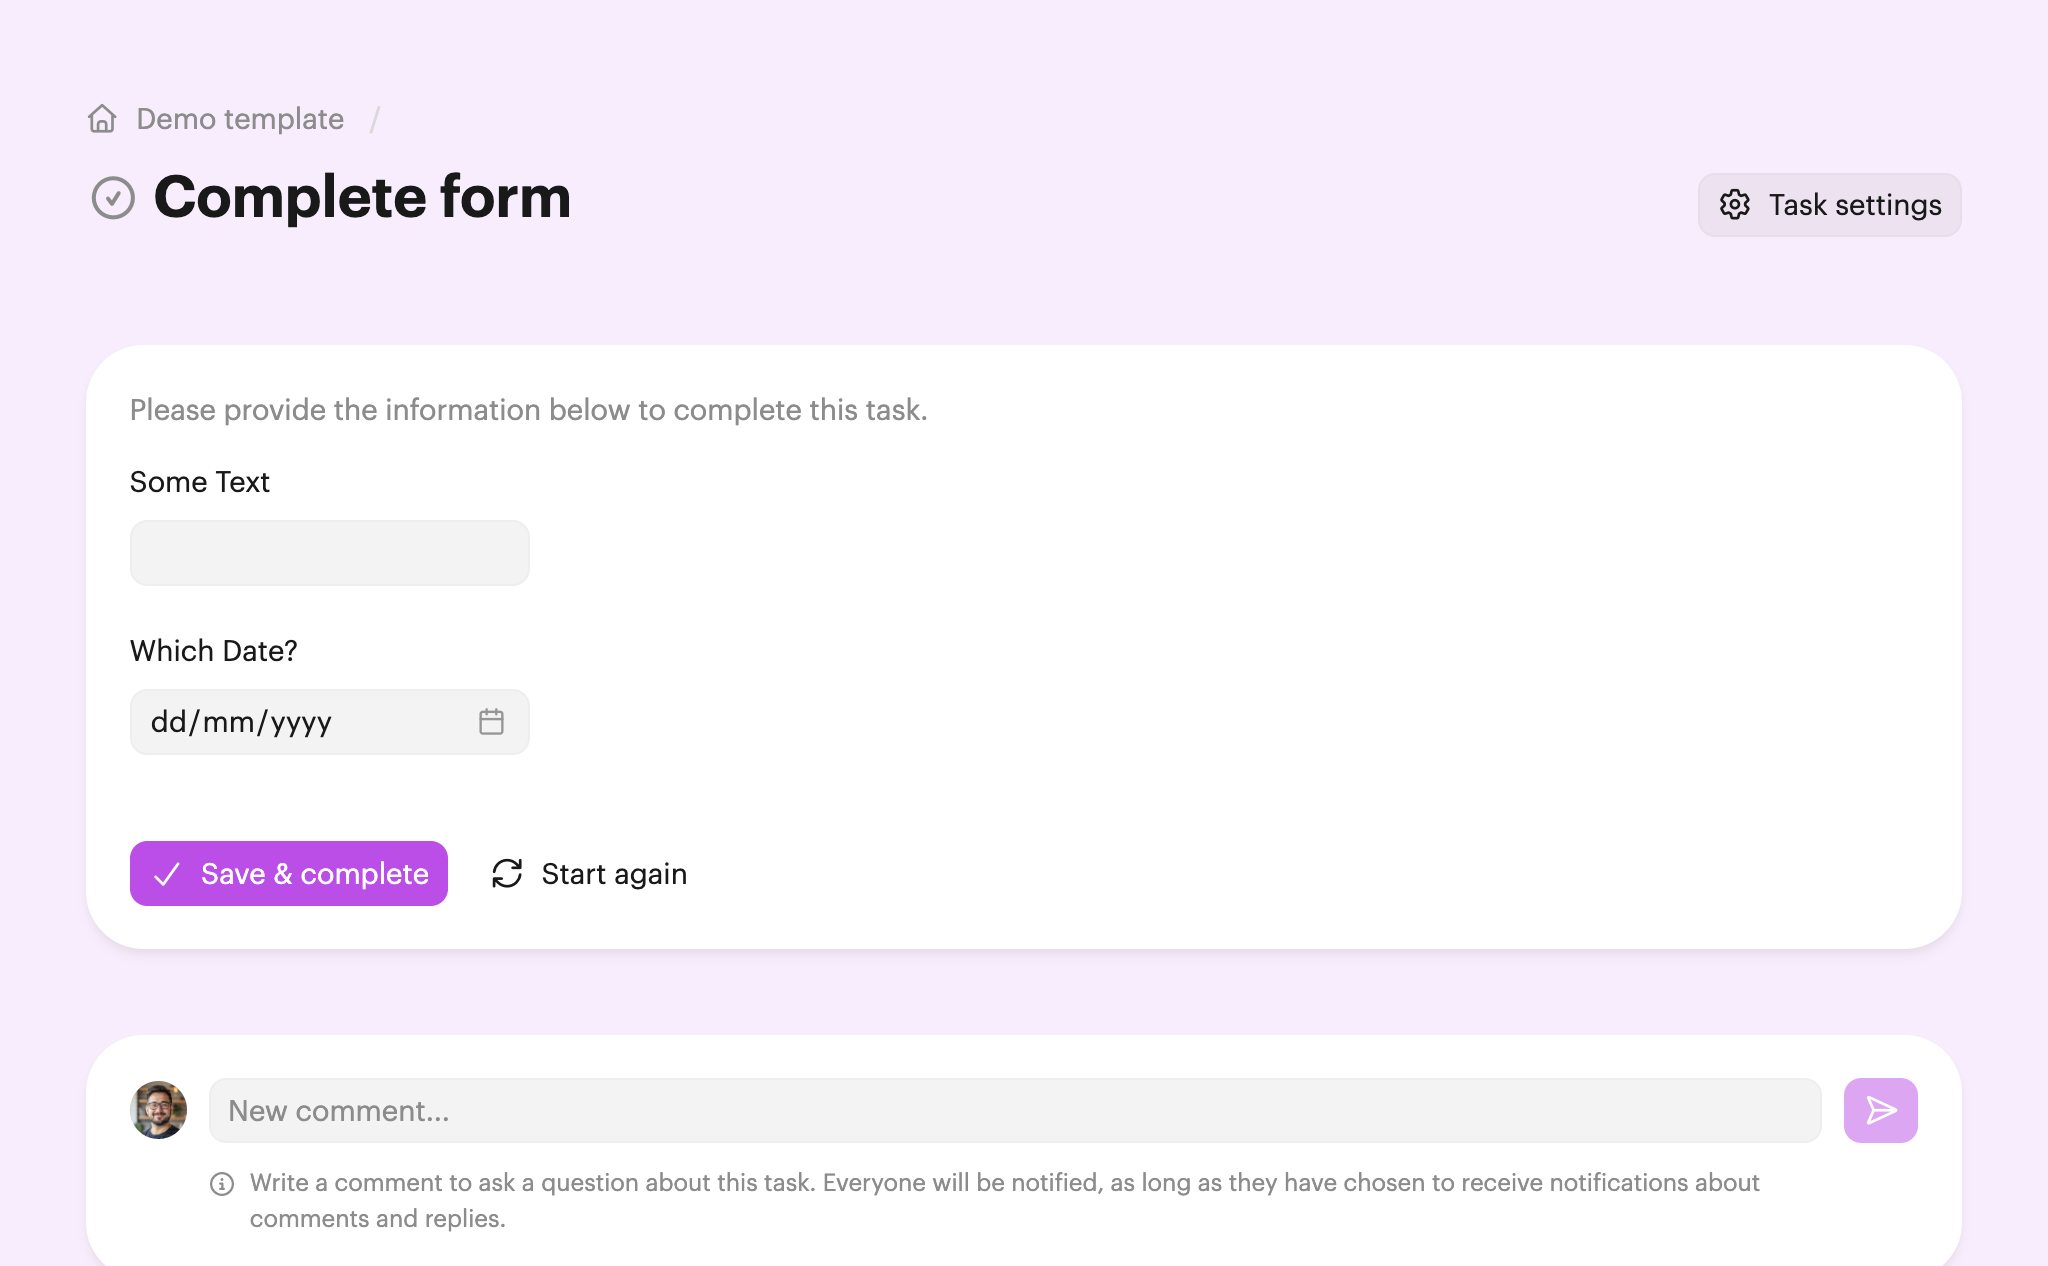
Once you're in the plan and click into the new task you'll see the form:
Once complete, anyone with access to the plan (participants or users) will be able to see the data that's been provided in the form:

The information provided in the form will also show on the plan summary page for users.
If you've followed the steps above to link fields to CRM properties, then you should now see that the properties in the CRM have been filled with the values from the form:

Note: If you don't see the properties, check that the plan is associated with a CRM object (Manage plan > Plan settings > CRM). Also check your inbox, as we'll send an email if there are problems syncing fields.

