Book meeting with Calendly
A task that requires a meeting to be booked through Calendly.


Onthen allows you to create onboarding 'plans' that you can send to customers, partners, prospects, or anyone else (we call them 'participants'). Each plan has a set of tasks that a participant needs to complete.
The Book meeting with Calendly task allows you to ask the participant to select a date/time and book a meeting in a calendar through the Calendly scheduler.
This task allows you to connect your Calendly account and then require participants to book any available meeting slot before they can complete the task.
When the participant opens the task, your Calendly booking widget loads up within the main task canvas and looks like an integral part of your plan. The participant will follow the instructions on screen to select a suitable meeting time, then enter their details to confirm the booking. Once complete, they'll be able to continue on to the next task.
You can either use your personal or team landing page (giving the participant a choice of event types), or display a booking page for a specific event.
Follow these steps to connect your Calendly account first. You can also connect during the setup of your task action if you prefer, it's the same process.
Click Integrations > Accounts > Connect. You'll see a list of accounts that Onthen integrates with:

Find the Calendly panel and click Connect. This takes you to Calendly to authorize the connection (you may first be asked to sign in if you're not already):

Click Approve, and after a few moments your Calendly account will be connected.
Now that you have your Calendly account connected, you can move on to finding the booking link you want to use.
You can choose to show participants your personal or team landing page (giving the participant a choice of event types), or show a booking page for a specific event.
In Calendly, click into Scheduling on the menu. Find the landing page you want to use, click View landing page (which opens the page in your browser), and then copy the web address.
Here's what it looks like:

In Calendly, click into Scheduling on the menu. Find the event you want participants to book, and click Copy link.
Here's what it looks like:

You'll need the link you copied in the next step.
Head back over to Onthen and open the Onthen template you want to add a meeting booking step into.
In the section you want to add the task, click Add task. Select Calendly / Book meeting as the task type. Add a description, due date, etc. if you need. Click Add task to create the new task.
When the task is saved, click on its name to configure it. You'll see a page like this:

Select the Calendly account you created earlier and click Continue. Next you'll see the configure page:
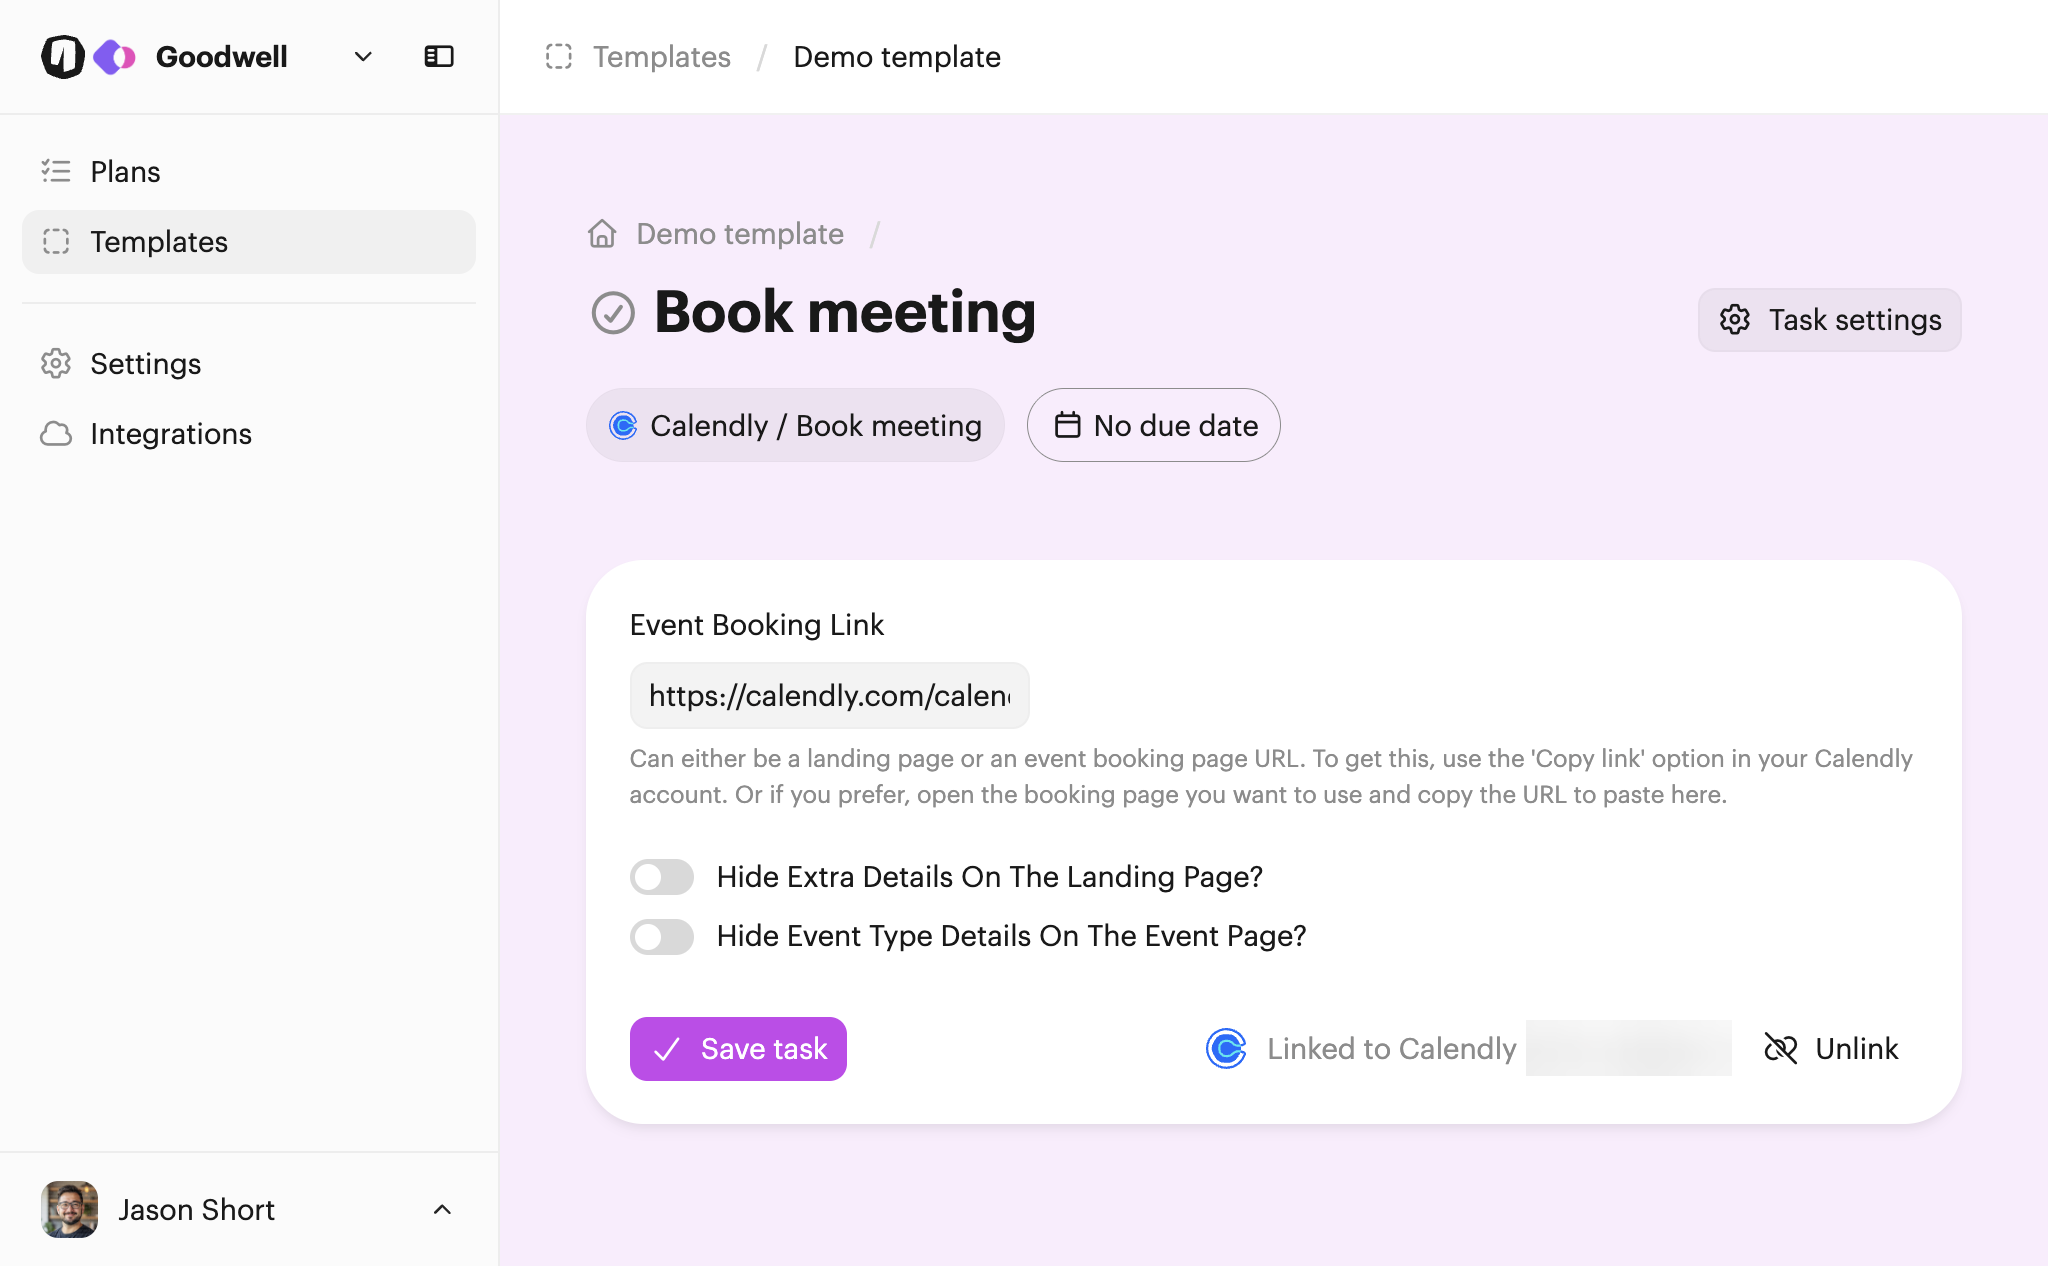
Paste in the booking link you copied earlier.
You can also choose to hide extra details shown on either the landing page or the event page. You may want to do this if you already explain to participants what it is they are booking in the task's description.
Finally click Save task.
You can test the action by creating a new plan.
The quickest way to test this task action is to go to the list of plans after you've created the new plan, and click its name to open it as the user.
Once you're in the plan and click into the new task you'll see the form:

Follow the steps to book the meeting in the Calendly widget, and after a meeting is booked you'll see that the task is complete:

You'll now be able to click on the Summary tab or click into the task and see the details of the booked meeting. It looks something like this:

Note: You'll see all result fields as you're accessing the plan as a user, but fields with the 'closed eye' icon will be hidden for participants when they visit the completed task page.
We'll automatically load the Calendly widget with the brand color you've chosen for your Onthen team. For example, you can see the purple team color of the dates on the calendar in the screenshots above.
To remove the "Powered by Calendly" logo, log in to your Calendly account, go to Account > Branding, and toggle off Use Calendly branding.
Note: Both of these customizations require that you have a paid Calendly account.


.png)